How to Run a New Apache JMeter Load Test
Run a new Apache JMeter Load Test with LoadFocus
It's quite easy to create a new load test for a website or API endpoint using the UI from the New Load Test page. You need to be logged into your account to be able to access this page and create a new test.
Steps to Configure a New Load Test
1. Choose a Test Name
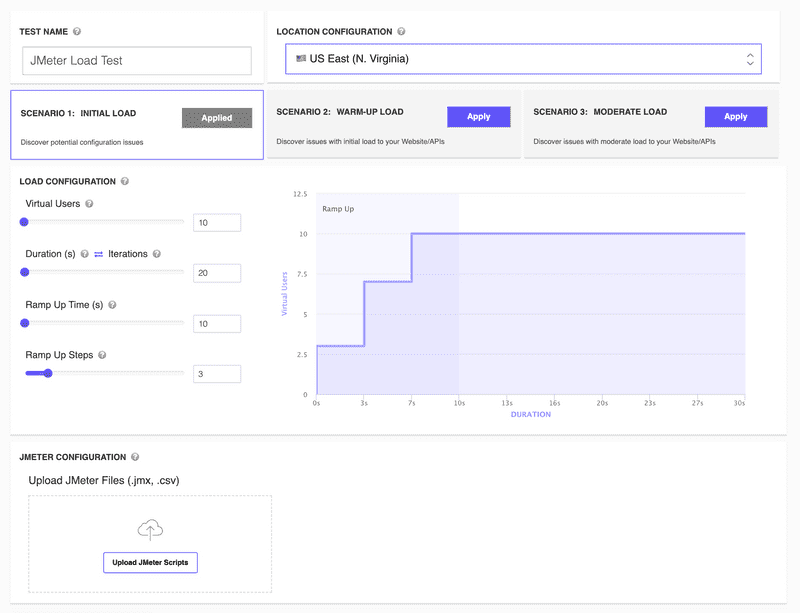
We automatically generate a test name for your test using the current date and time. You can change the test name for your load test by going to the Test Name input field and setting your own name.
2. Choose Up to 5 Test Locations
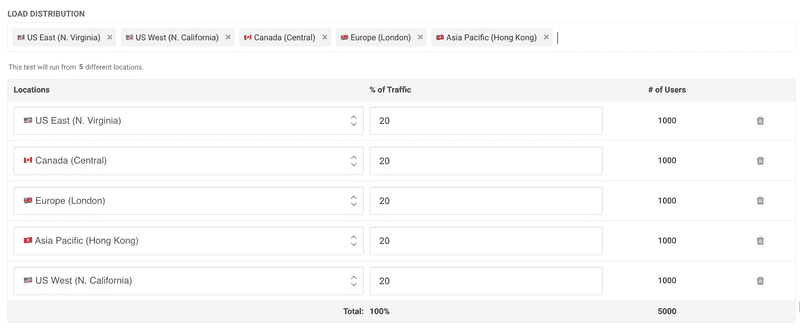
You can now select multiple locations (up to 5) from which to inject load. This simulates real-world traffic coming from different geographical regions simultaneously. Each selected location can be assigned a percentage of traffic or a specific number of Virtual Users. For example, if you choose 5,000 Virtual Users in total, you can distribute them across multiple locations, such as:
- US East (N. Virginia): 20% (1,000 users)
- Canada (Central): 20% (1,000 users)
- Europe (London): 20% (1,000 users)
- Asia Pacific (Hong Kong): 20% (1,000 users)
- US West (N. California): 20% (1,000 users)
More details about the available locations can be found here. If you need to whitelist IPs, please refer to this guide.
Per-Location Results
When running tests from multiple locations, you can inspect performance metrics such as response times, errors, and hits/s per individual location or view the combined results. This level of granularity helps you better understand how your application performs for users in different regions.
3. Load Scenarios
We offer three predefined scenarios to help you get started quickly:
- Initial Load
- Warm-up Load
- Moderate Load
Simply click the Apply button on any scenario to auto-fill the load test configuration.
4. Test Configuration
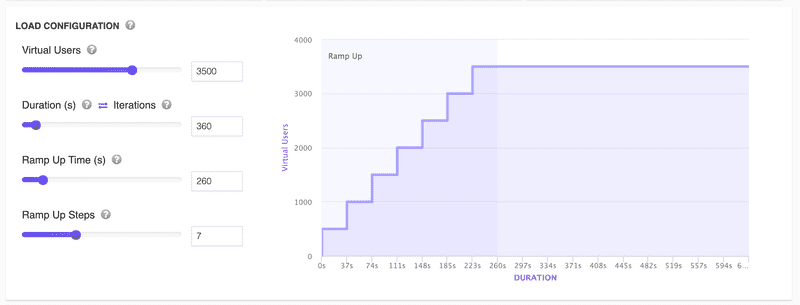
The Load Configuration step is where you define:
- Number of Virtual Users
- Test Duration (or Test Iterations)
- Ramp Up Time
- Ramp Up Steps
You can visually inspect how your load test will run by viewing the chart that displays the ramp up process and overall duration.
5. Upload and Validate Apache JMeter Scripts
Here is where you upload your JMX test script file (one per test) and any CSV files you might need.
JMeter Script Validation
- We have added automatic validation of JMeter
.jmxfiles upon upload. - You can drag and drop your
.jmxand.csvfiles into the upload area or use the Upload JMeter Scripts button. - If there are any issues with the script, you’ll be notified immediately.
Running the JMeter Test and Inspecting Results
After configuring your load test and uploading all necessary files, click Run Test to start your JMeter load test.
Once the test is complete, you can:
- View overall performance metrics in the Overview tab.
- Analyze per-location results to see how each region performed.
- Inspect errors, response times, hits/s, and more in the detailed results sections.
For more details on analyzing Apache JMeter load test results, please see our Load Test Results guide.


