

Uploading JMeter Files to LoadFocus: A Step-by-Step Guide
JMeter, an open-source software for load testing and performance measurement, is a favorite among QA engineers and testers. With LoadFocus, you can now seamlessly upload your JMeter test scripts (.jmx) and configuration files (.csv) to run your tests in the cloud. Our enhanced upload interface supports drag and drop functionality and includes automatic validation for .jmx files to ensure your test scripts are error-free.
Prerequisites
Section titled “Prerequisites”- JMeter Test Script: Must be saved as a
.jmxfile. - Configuration File: Typically a
.csvfile, if your test uses external data. Text files, certificates and images are accepted too, up to 10 files per test, each up to 100 MB.
Step-by-Step Process
Section titled “Step-by-Step Process”- Prepare Your Files
- Ensure that your
.jmxand.csvfiles are ready. - If your files reference each other, make sure they are located in the same directory.
- Use relative paths within your JMeter
.jmxfile (e.g.,./data.csv) instead of absolute paths.
- Access LoadFocus
- Log in to your LoadFocus account.
- Initiate the Upload
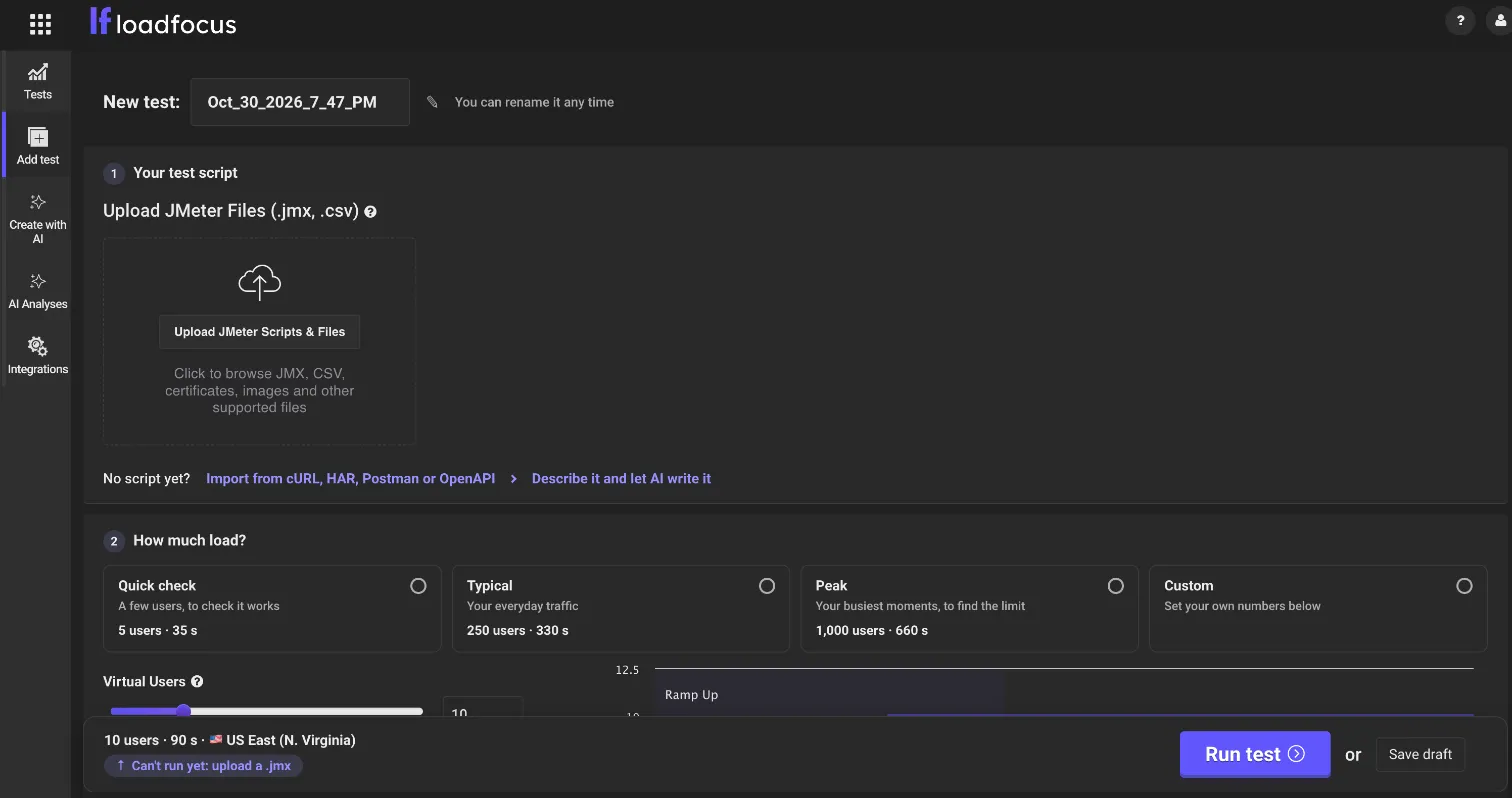
- Open the New JMeter Test page and find the Upload JMeter Scripts & Files box in step 1 Your test script, at the top of the page.
- Select Files
- Drag and Drop: Simply drag and drop your
.jmxand.csvfiles into the designated upload area. - Manual Selection: Alternatively, click the upload area to browse and select your files.
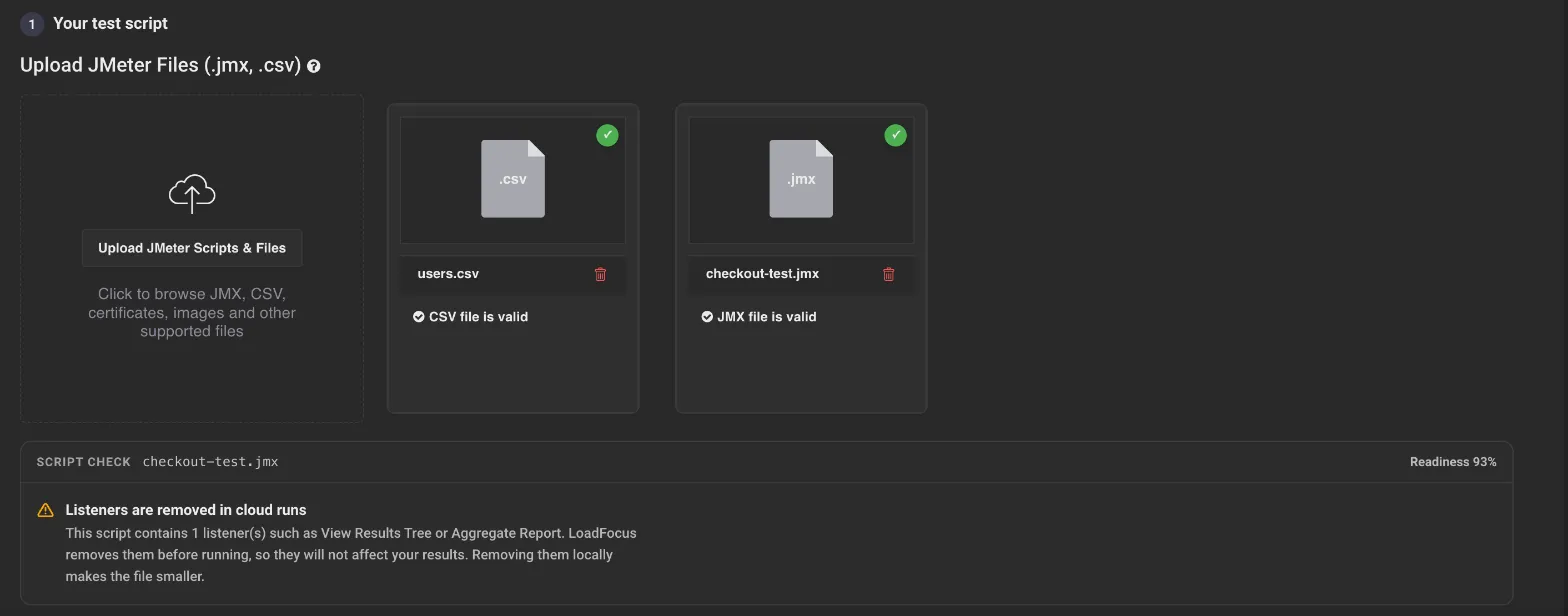
- Automatic JMX Validation
- As soon as you upload your
.jmxfile, LoadFocus will automatically validate it. - Any issues or errors in the script will be flagged immediately so you can address them before running your test.
- Finalize Upload
- Once your files are selected and validated, they are listed under the upload box. You can remove a file or add more before you run the test.
- Run the Test
- After uploading, set the load and the locations, then click Run test in the bar at the bottom of the page.
- Your test will execute using the uploaded JMeter script along with any configuration files provided.
- Review and Analyze
- Upon completion, review the test results on LoadFocus.
- Analyze response times, error rates, and other key metrics to evaluate the performance of your application or website.
Tips for a Smooth Upload
Section titled “Tips for a Smooth Upload”- Consistency is Key: Ensure every file referenced in your JMeter script is uploaded to avoid errors.
- Use Relative Paths: Keep your file references relative (e.g.,
./data.csv) to ensure the paths remain valid once uploaded.