How to Create a New API Check
Create a New API Check with LoadFocus
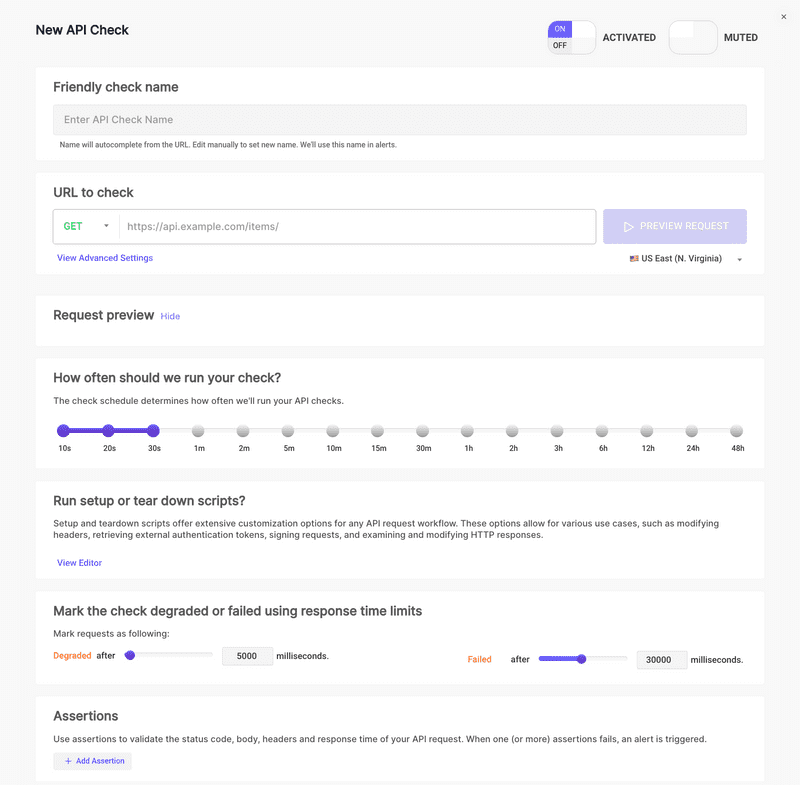
It's quite easy to create a new API check for an endpoint using the UI from the New API Check page.
Steps to configure a new API check
1. API Check Friendly Check Name
We automatically generate a friendly check name for your API check using the current date and time. You can edit it manually to set a new name. We'll use this name in alerts.
See more details about Friendly Check Name.
2. API Check Request Configuration
Set the URL endpoint of your API under test and choose from the allowed HTTP methods: GET, POST, PUT, PATCH, DELETE. You can also configure query parameters, headers, POST body, basic authentication, skip SSL, and follow redirects.
See more details about Request Configuration.
3. API Check Request Preview
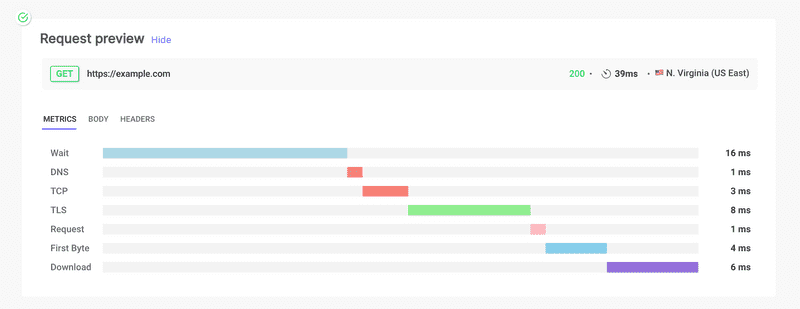
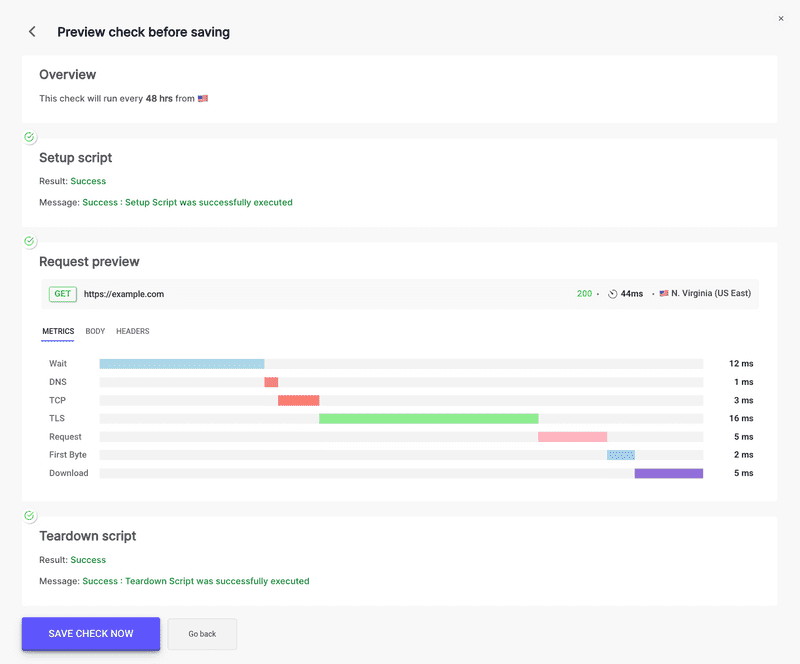
Simulate the request from any of the 26 cloud locations to preview how the API Check will behave. Check response time and metrics like Wait, DNS, TCP, TLS, Request, First Byte, and Download. View the full body of the API response, as well as the Request and Response Headers.
See more details about Request Preview.
4. API Check Frequency
Select how often you want the API check to run, with options ranging from every 10 seconds to every 48 hours. This flexibility helps in continuously monitoring the health and performance of your API.
See more details about Frequency.
5. API Check Limits - Set Response Time Limits
Mark the check as degraded or failed based on response time limits. Configure the degraded and failed thresholds in milliseconds to identify performance issues early.
See more details about Response Time Limits.
6. API Check Assertions
Validate the status code, body, headers, and response time of your API request. When one or more assertions fail, an alert is triggered.
See more details about Assertions.
7. API Check Locations
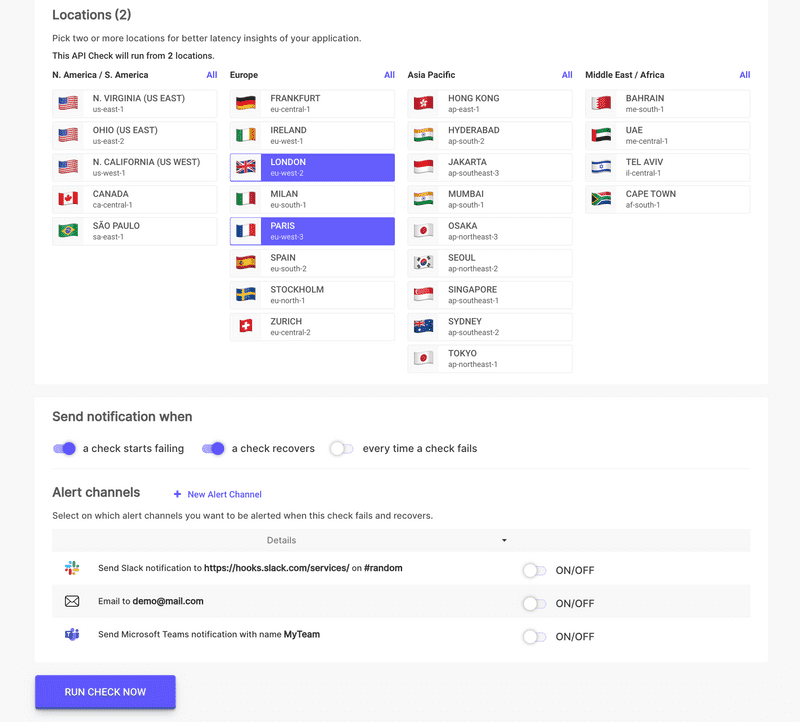
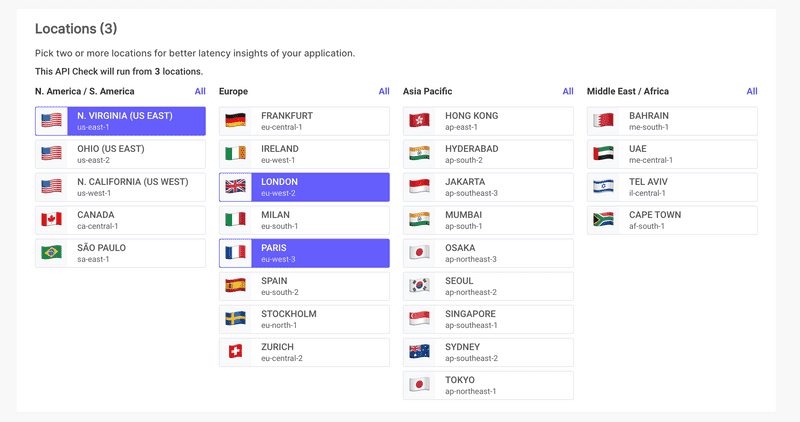
Run the API Check from one or many locations. If the check fails in one location, the whole check is marked as failed. Pick two or more locations for better latency insights of your application.
See more details about Locations.
8. API Check Alert Channels
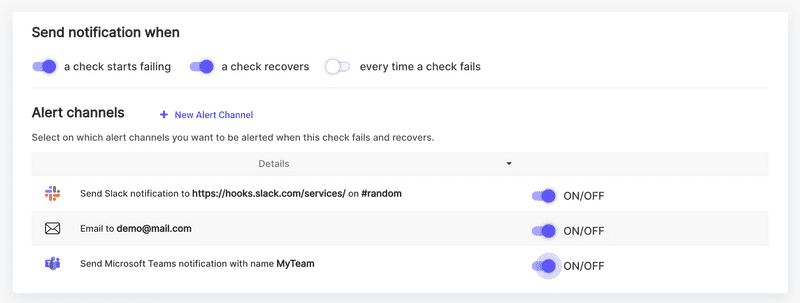
Select the alert channels you want to be notified on when this check fails and recovers. You can set alerts to multiple email addresses, Slack channels, and/or Microsoft Teams channels.
See more details about Alert Channels.
9. API Check Activate/Deactivate
Toggle the API Check to be ACTIVATED or DEACTIVATED. When deactivated, the API Check will not run based on the configured schedule and will be displayed as greyed out in the list of API Checks.
See more details about Activate/Deactivate.
10. API Check Mute/Unmute
Toggle the API Check to be MUTED or UNMUTED. When muted, the API Check will still run based on the schedule or on demand, but no alerts will be sent.
See more details about Mute/Unmute.
11. API Check Save and Run
Click the "Run Now" button to preview the request and see if the current API Check is passing or failing. From this preview screen, you can also save the API Check to run based on the configured schedule.
See more details about Save and Run.
By following these steps, you can easily set up and monitor your API endpoints to ensure they are performing optimally and are available for your users.
You can find all your API Checks at the API Monitors page.
